Showing posts with label cocoa. Show all posts

Thursday, January 15, 2015

Chocolate Peanut Butter Cup Dream (No added sugar)


This is so yummy and has all the right flavors in it. It is good to the last drop and no added sugar. The chia added to it add nice health benefits as well as a nice thickener. Yum! Keeping healthy in 2015 with out sacrificing the flavor.


Ingredients

2 C cashew milk (use your favorite kind)
1 T cocoa
2 frozen bananas
2 T chia
3 T  natural creamy peanut butter
1/4 C dark chocolate chips
8 Ice cubes
*Garnish with chopped up chips if desired

Directions Seves 2

1. Pour into the blender milk, cocoa, bananas, chia, and peanut butter. Blend until all creamy.
2. Add the chips and ice and blend until creamy.
3. Serve right away! Good to the last drop.

Wednesday, December 3, 2014

Peppermint Cream Hot Cocoa (Dairy Free)


 So peppermint and chocolate are a favorite at our house. So I thought it would be fun to make it into hot cocoa on a cooler day like today. It is a delicious way to warm up. I even made it dairy free. It is a fast and easy recipe. You won't be buying mixing again when you see how easy it is. It was a nice creamy treat. Happy Holidays.

Ingredients

2/3 C  canned coconut milk (chilled at least a couple hours)
1 1/2 C cashew milk or almond milk of milk of your choosing
1 1/2 T cocoa
5 T honey or vegan sweetener
1/2 tsp peppermint oil or peppermint extract
Whipped coconut milk.

Directions

1. In a saucepan on medium heat. Pour coconut milk and cashew milk together. Stir in the cocoa. I used a wire whisk.
2. Stir in honey and oil. Heat until all the cocoa is warm.
3. Take off the heat pour into cups.
4. With the remaining thick coconut milk off the top.  Not the liquid. Beat the milk until soft peaks form and place a dollop of cream on top the hot cocoa. Enjoy!

*You can also try dairy free Creamy pumpkin spice hot cocoa. 


Saturday, October 25, 2014

Creamy Pumpkin Pie Hot Chocolate (Dairy Free)

This is a delicious way to enjoy to enjoy an Autumn Day. Loved the creamy pumpkin flavor. Great way to warm up anytime of the day. Love Love this. 

 Ingredients

1 1/4 C almond milk
2/3 canned coconut milk
1 1/2 T cocoa unsweetened
1/4 C canned pumpkin
5-6 T honey or maple syrup
1 tsp pumpkin pie spice
1 tsp vanilla
*extra coconut milk or almond milk for on top

Directions    serves 2-3 

1. In a saucepan on medium low heat pour in everything except vanilla. Watch so it doesn't boil over. Beat together with a wire whisk, and heat for about 5 min.
2. Take off the heat and stir in vanilla. Top with milk and swirl around if desired. Enjoy a yummy treat. :)

*You could dollop whipped coconut cream on top too.


Friday, October 3, 2014

Chocolate Almonds


These are a fast and easy snack to make and have ready to take with you. I had just bought my daughter some of these last month for her birthday. It was fun to see how easy they are to make. They are a great combination with dark chocolate and almonds. Winner! Have a great weekend. It is a colorful time of year. These would make a fun hostess gift.  

Ingredients

3 1/2 T unsweetened dark cocoa powder
1 1/2 tsp cinnamon
1/4 tsp salt
2  1/2 tsp honey
1 tsp vanilla extract
1/4 tsp almond extract
2 C raw almonds  or roasted*

Directions

1. In a small bowl mix together cocoa, cinnamon and salt. Set aside.
2. Mix together honey, vanilla, almond extract in a small saucepan on the stove. Heat on low until the honey turns to liquid and the mixture is all combined. Take off the stove.
3. Pour the almonds into the honey mixture. Stir until all coated. 
4. Then pour the cocoa mixture over the nuts and stir until they are all covered. 
5. They are ready to enjoy. Store leftovers in airtight container. Happy snacking.

*You could roast the almonds ahead of time for added flavor. Spread in a skillet on the stove in single layer on medium heat. Stir often until they turn brown. Should take only about 5 min.  Don't let them over cook. Then continue with instructions as above. The roasting gives them an extra crunch. 


Tuesday, September 30, 2014

Chocolate Pumpkin Lava Cake


I am having a lot of fun this season creating a lot of things out of pumpkin. Here is a delcious dessert.

This was a recipe my girls used to love to make. I thought it was time for a healthier remake. This cake has completely whole grain flour, no white sugar, and it is incredibly moist. A lot of people think you have to sacrifice flavor when you cook desserts with whole grains, but this proves everybody wrong. This cake is incredibly gooey with a hot fudge sauce inside. Your holiday guests would be so impressed with this dish!

I changed it up by adding pumpkin to it.


Ingredients:

1 C whole grain flour ( I used spelt)
2 tsp baking powder
2 T cocoa
3/4 C canned pumpkin
dash of salt *optional
1/2 C almond milk
2 Tbsp melted coconut oil
1 tsp vanilla
1/2 C honey

Topping

1/2 C honey
4 Tbsp cocoa
1 Tbsp whole grain flour

Directions

1. In a large bowl, stir together flour, baking powder. cocoa, pumpkin and salt. Sift together so that it is all combined evenly.
2. Stir in milk, oil, vanilla, and honey until just incorporated. Pour dough evenly into 4 to 5 ramekins. (You could also use an 8×8 pan instead of the ramekins, but you would have to change the baking time.)
3. In a small bowl, mix together honey, cocoa, and 1 Tbsp flour. You will have a thick, wet batter. Dividing the mixture evenly between the ramekins, scoop the new batter on top of each uncooked cake, spreading it gently. Try to keep it away from the edges as much as possible. 
4. Now take about 1/2 C of water and distribute it gently between all the ramekins, on top of each cake. Each ramekin should have about 1/4 inch water sitting on top, although it will soak in quickly. Place on a cookie sheet to bake them. Easier to get them in and out. 
5. Cook at 350 degrees F for 20 minutes, or until top looks done. The cake may have chocolate sauce seeping around the edges, and the middle will still be moist.
6. Cool just until it won’t burn off your taste buds. :) Leave plain or top with whipped coconut cream, whipped cream, or ice cream. Then devour!



Pumpkin Brownies


Here is a fun way to use your pumpkin to make a healthy whole grain snack or dessert. I love finding new ways to use pumpkin. This is such a great time of the year. Happy Baking!

Ingredients

3/4 C canned pumpkin
1/2 C almond milk
1/2 C honey
1/4 C coconut oil
1 egg
2 C whole grain flour (I used spelt)
1 1/4 tsp baking powder
3 T cocoa
1/4 C chopped up dark chocolate chips

Directions   Bake at 350

1. Blend in blender or beat in a bowl pumpkin, milk, honey, oil and egg until all smooth.
2. In a medium sized bowl stir together flour, baking powder, and cocoa.
3. Pour in the pumpkin mixture into the dry ingredients. Stir until smooth.
4. Fold in the chips until all combined.
5. Pour in a parchment lined or greased square pan.
6. Place in preheated oven and bake 25 to 30 min. or until done.
7. Cool on cooling rack and then cut up and enjoy. Store in airtight container. 


Monday, June 30, 2014

Raw Brownie Bites


These are a healthy version of brownies that you get from a box. You can have them ready in the fridge when you get that craving. They are easy to make and taste great! Brownies with out the guilt. 
Ingredients

1/4 C almond milk
3 T chia *optional (So good for you)
2 1/2 T cocoa powder
1 T honey
1 T coconut oil
1 tsp vanilla
1/2 C cashew butter or almond butter (make your own)
1/4 C chopped up cashews

Directions

1. In a blender blend the milk and chia together to break down the chia.
2. Then add the cocoa, honey, oil, vanilla and butter. Blend and stir until all combined.
The mixture will be sticky. Place the mixture in the fridge about 30 min or less until it thickens up.
3. Grease hands with oil.
4. Place chopped nuts on a plate.
5. Roll into small balls (makes about 8). Then roll into nuts.
6. Eat or store in air tight container in the fridge. Enjoy!

Wednesday, May 28, 2014

Chocolate Peanut Butter Chia Pudding

My son Derek came home and told me he is all done with his classes. He graduates on Friday. We went to his tennis banquet last night. We are sad to see that 4 year chapter closing.  My season of having children at home going to school is over. I was reflecting on all the memories I have of the past 25 + years of having children in school. It is fun to think back on all of the school programs, helping in classes, school dances, tennis matches, home lunches, reports, report cards, teachers, graduation ceremonies, coaches, friends, bus rides, field trips. There are many cherished memories. I knew the day would come it is crazy to have it here.  As this chapter comes to a close I am thankful for my 7 sweet children that have been a part of those sweet memories. I love being a Mom. My favorite job in the whole wide world. I get sentimental in closing this chapter of life but, look forward to the chapter that is ahead. Life is good.

My little boy is not little anymore. 


So it was a great day to make some pudding. It is always a good day to eat pudding especially when it is a healthy recipe like this one. You can't go wrong when you mix chocolate and peanut butter together. Then adding in the chia is an added bonus.


Ingredients

2 C almond milk unsweetened vanilla
4 T chia
2 T peanut butter
2 T cocoa powder
3 T honey or 6 softened dates for vegan version
1 frozen banana  cut in pieces*optional

Directions serves 4

1. Pour all of the ingredients into the blender. Blend until smooth.
2. Pour into dishes and chill in the fridge at least 4 hours or overnight. 
3. Take out of the fridge and serve. Oh Yum!

Here is a chocolate peanut butter split smoothie with chia. 


Wednesday, March 12, 2014

Refrigerator Chocolate Oatmeal Peanut Butter Cookies


So  this is a spin off of this recipe. I changed the chocolate to cocoa. This recipe was always a favorite as I was growing up. I just made it a healthier version than the old recipe that I made before. My family gobbles them up. They are delicious. I hope you enjoy them too.   

If you don't have oat flour on hand, just put some oats in your blender and pulse until it reaches a flour consistency. Use gluten-free oats for a gluten-free cookie.

Ingredients 
2 C old fashioned oatmeal
1 C oat flour
1/2 C honey
2 T cocoa powder
1/4 C coconut oil
3 T peanut butter (natural)

Directions: Makes about 18 cookies
1. Stir all the ingredients together in a bowl.
2. Scoop on to parchment paper, Teflon sheet or wax paper that is on a cookie sheet. (You could flatten them if you want to)
3. Place in  refrigerator and let harden. Keep stored in fridge in air tight container.


Here are some other great chocolate peanut butter cookies. 

Here is another refrigerator chocolate peanut butter cookie.
Here is a gluten free nutter chocolate peanut butter cookie.

Monday, January 27, 2014

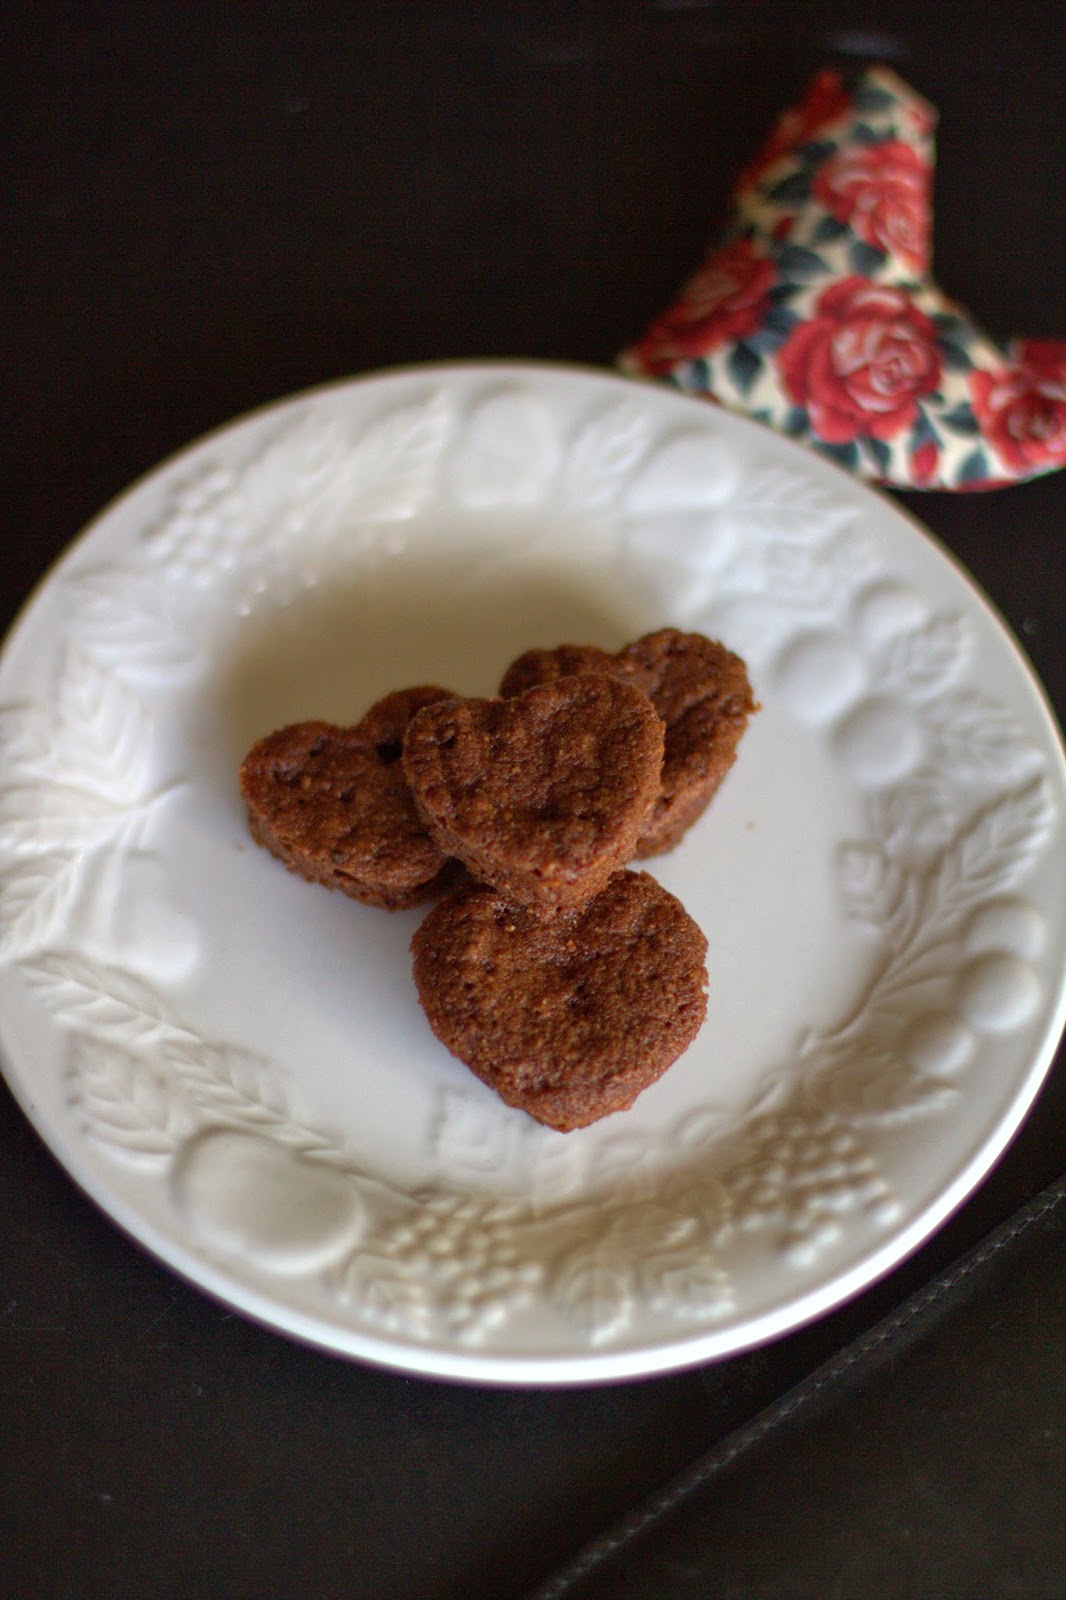
Whole Grain Chocolate Heart Bites


Whole Grain Chocolate Heart Bites


Silicone pan heart pan
Our fun continues finding fun healthy ways to celebrate and enjoy Valentines Day. One of our favorite holidays of the year. :) I found this darling silicone heart pan at WalMart. I couldn't pass it up. So I started coming up with recipes to fill it with. Here is one of them. They are a fun little bite size treat and they even are healthy, which is a nice bonus. The nice thing with eating whole grain is it fills you up faster, and so don't need to eat as many to get filled up. These are a cross between a cake and a brownie. YUM!

Ingredients
1 C whole grain flour (I used all spelt)
2 tsp baking powder
2 T cocoa
dash of salt
1/2 C almond milk
2 T coconut oil
5 T honey

Directions makes 24 small hearts or mini muffins
1. Preheat oven 350 degrees. Pour all the dry ingredients together and stir with a whisk until all combined.
2. Make a well in the middle and and pour the wet ingredients in the well. Stir until all combined.
3. Grease heart pan or you could also use a mini muffin pan.
4. Scoop into each hole until it almost reaches the top. Place in oven . Bake for 10 to 13 minutes if you are using a mini-muffin-sized pan. (You will have to adjust the time if you are using a different-sized pan. Bake until a knife inserted in the center comes out clean.)
5. Let the pan cool on wire rack for 5 minutes. Scoop out gently. A knife may help in lifting them out.
6. Cool on the wire rack. (You could dust them with powdered sugar if desired.) Enjoy!

Friday, January 24, 2014

What is the difference between Cocoa vs. Cacao and information on Dutch chocolate

http://www.cocktailfiesta.com/wp-content/uploads/2012/03/Natural-Unsweetened-Cocoa-Powder-and-Dutching-cocoa-or-Alkalized-Unsweetened-Cocoa-Powder.jpg
picture from here

I was in the health food store yesterday and cacao powder in the bin and noticed it was double the price of cocoa powder. So I thought I would give it a try and bought a little of it. When I got home I was curious to read about what the difference was. This is something I read (from here). There are some typos, but it's from a chemical engineer who's worked in the cocoa industry.

"Cocoa powder and cacao powder is the same.
"What is considered "raw" cacao is suppose to be a cocoa powder that has been in a process that never exceeded 110 degrees Fahrenheit...which is already an almost impossible scenario, since cocoa beans are grown in the Equator, and you may exceed that temperature while drying in the patio under the sun covered with black linens (to heat it up and allow the fermentation of the bean)....and yes, you need to dry them, otherwise they will rotten in a few days, and the shell will be too difficult to peel off.

"Back to cocoa powder....
"ALL cocoa powder comes from the cocoa bean, which without the shell is called cocoa nib (a.k.a. cacao nib). The first step is grinding of the nib (which again, when you grind something to such small particle size you will create a lot of friction with -that's right - heat!). That will give you the cocoa/cacao paste (a.k.a. cacao mass or liquor), which has about 50 to 56% fat (cocoa butter) in it...and ALL cocoa powders have to go through that stage.

"Next stage is to take some of that butter away, which the raw community claims can be done through "cold pressing". For any that don't understand that term, cold pressing is done with oils like olive oil to preserve the oil almost intact by cooling the press plates while applying pressure (pressure generates heat, therefore it needs to be cooled). But here is a reminder, olive oil is liquid in room temperature, cocoa butter is SOLID, and it STARTS melting at about 100 degrees Fahrenheit ... so, you cannot control and cool it to a point where it will be still in a solid phase, because it cannot be pressed and "flow" out.

"Last operation is to grind the solids left in the press, again - heat...and there is your cocoa powder or cacao powder... you tell me if you call it "raw", a term not defined by the FDA for cocoa, and that can be used by anyone just to sell the cocoa to a much higher price. Maybe that is why bigger, more serious companies don't have this product, since they do not want to be liable for false advertising...

"Regarding "Raw" cocoa nibs or cocoa beans...yes, that is possible, and the only concern is the high bacteriological plate count... but how much you want to train your immune system is up to each individual. And yes, the less manipulated the cocoa, the more polyphenols and healthy chemicals you will obtain from it.

"There is also a difference between alkalized or ducthed powders, and the natural ones (which do not contain any potassium carbonate), being the second ones the ones containing more of the healthy properties (antioxidants). But that is totally different than claiming a "raw" cocoa powder."

It pays to know your information before you buy. I spent money that was not necessary.

I also learned the difference between dutch and regular Cocoa. This is from the Joy of Baking.com

"Cocoa Powder Cocoa powder is made when chocolate liquor is pressed to remove three quarters of its cocoa butter. The remaining cocoa solids are processed to make fine unsweetened cocoa powder. There are two types of unsweetened cocoa powder: natural and Dutch-processed.

"Dutch-Processed or Alkalized Unsweetened Cocoa Powder is treated with an alkali to neutralize its acids. Because it is neutral and does not react with baking soda, it must be used in recipes calling for baking powder, unless there are other acidic ingredients insufficient quantities used. It has a reddish-brown color, mild flavor, and is easy to dissolve in liquids. Its delicate flavor makes it ideal in baked goods like European cakes and pastries where its subtle flavor complements other ingredients. Droste, Lindt, Valrhona, Poulain and Pernigotti are some popular brands. Natural Unsweetened Cocoa Powder tastes very bitter and gives a deep chocolate flavor to baked goods. Its intense flavor makes it well suited for use in brownies, cookies and some chocolate cakes. When natural cocoa (an acid) is used in recipes calling for baking soda (an alkali), it creates a leavening action that causes the batter to rise when placed in the oven. Popular brands are Hershey's, Ghirardelli, and Scharffen Berger.

"The role of cocoa powder in cakes:

"When used alone in cakes, cocoa powder imparts a full rich chocolate flavor and dark color. Cocoa powder can also be used in recipes with other chocolates (unsweetened or dark) and this combination produces a cake with a more intense chocolate flavor than if the cocoa wasn't present. Most recipes call for sifting the cocoa powder with the flour but to bring out its full flavor it can be combined with a small amount of boiling water. (If you want to try this in a recipe, substitute some of the liquid in the recipe for boiling water.) Often times, you may notice that more butter and leavening agent are used in recipes containing cocoa powder. This is to offset cocoa powder's drying and strengthening affect in cakes. There are two types of unsweetened cocoa powder: natural and Dutch-processed and it is best to use the type specified in the recipe as the leavening agent used is dependent on the type of cocoa powder. Some prefer using Dutch-processed cocoa as a slight bitterness may be tasted in cakes using natural cocoa and baking soda.
"To convert a cake recipe that uses bittersweet or semisweet chocolate to one using cocoa: (information taken from Rose Levy Beranbaum's Cake Bible)

"Substitute 1 tablespoon plus 1 3/4 teaspoons(9.5 grams) of cocoa, 1 tablespoon plus 1/2 teaspoon (14.5 grams) granulatedwhite sugar, 1 1/2 teaspoons (7 grams) unsalted butter for every ounce (28grams) of bittersweet or semisweet chocolate. Also, dissolve the cocoa inat least 1/4 cup (60 ml) hot liquid to bring out the cocoa's full flavor.To convert a cake recipes that usesunsweetened chocolate to one using cocoa: (information taken from Rose Levy Beranbaum's Cake Bible)

"Substitute 3 tablespoons (18 grams) cocoaplus 1 tablespoon (14 grams) unsalted butter for every 1 ounce (28 grams) ofunsweetened chocolate. Dissolve the cocoa in at least 2 tablespoons ofliquid in the recipe to bring out the cocoa's full flavor.
"


Read more: http://www.joyofbaking.com/cocoa.html#ixzz1ZLzjV6lL

I knew there was a difference between dutch and plain cocoa powder but didn't know the reasons they were diffferent and how the dutch works better with baking powder. I learned some new things. Hopefully you did too.

Thursday, January 16, 2014

Dark Chocolate Cashew Truffles


You guys are going to love these. They are simple chocolate and nut goodness. That is all. They would make a great Valentine's treat! You could put them in a cute bag with a ribbon too.

Ingredients
1 C cashews (soaked for at least 20 min.)
1/4 C honey
1/4 C cocoa
about 15-20 crushed almonds

Directions
1. Soak cashews in enough water to cover them. Let them sit for 20 minutes. Longer would be great to if you have time.

2. Put cashews, honey, and cocoa in a blender or food processor. Pulse until all combined. You might have to open the lid and stir a couple of times so they mix properly.

3. Take out the mixture and roll them into 1-inch balls using your hands.

4. Crush almonds in blender or food processor. Roll the truffles in the nuts until coated. Keep in the refrigerator until it is time to serve them.

Wednesday, May 22, 2013

Healthy Strawberry Banana Chocolate Frosty

It is that wonderful time of year when everything is turning green. Yeah! I love being outside in the wonderful sunshine and soaking it in this time of year. This is a wonderful frosty treat that you can enjoy as the weather starts warming up.  I think it could taste great anytime of year

Ingredients:

2 C  unsweetened Almond milk (I used 3/4 C of kefir to replace 3/4 of almond milk)
30 Ice cubes
1/2  tsp vanilla
2 frozen bananas chopped up
5  frozen strawberries
*1 T unsweentened cocoa  (You could not use the cocoa and make it vanilla instead)
* 1 T honey If you want it sweeter.  I did not add this to mine.

Directions: Makes 3-4 servings
1. Pour in the liquid first. (You may have to make 1/2 the recipe at a time depending on your blender. I did it all at once with my Blendtec. ) Then add the rest of the ingredients. Blend until all combined. Enjoy a wonderful frosty treat.

Thursday, June 14, 2012

Whole Grain Chocolate Pumpkin Muffins

 I came up with this idea last night. I thought instead of pumpkin chocolate chip muffins to make chocolate pumpkin muffins. They turned out great. My family keeps eating them so that is always a good sign. They could be frozen for a quick snack too. Hooray, for "healthy snacks" .

Ingredients
3 1/2 C whole grain flour (I mixed 2 C spelt, 1 C kamut, and 1/2 C quinoa, ground together)
1 C light brown sugar, packed
2 tsp baking soda
1 tsp baking powder
3/4 tsp salt
2 tsp nutmeg
2 tsp cinnamon
1 15-oz. can pumpkin, or 2 C fresh pumpkin puree
1/2 C coconut oil (another oil would also work if you are in a pinch)
1/2 C  applesauce
2/3 C Pure Almond Milk
1/4 C cocoa (mine was a blend of Dutch and natural cocoa)

Directions
1. Preheat oven to 350 degrees. Grease pans with cooking spray.

2. Mix together dry ingredients in a large bowl. In another bowl, combine pumpkin, oil, applesauce, and almond milk.

3. Mix together wet and dry ingredients until just combined. Pour in mini muffin tins.

4 Bake until a toothpick inserted in the center comes out clean.

Makes about 36- 40 mini muffins.

*You could make it into a loaf instead of muffins.

Friday, September 16, 2011

Oh so good ! Wholegrain Chocolate Zucchini muffins


These are wonderful moist muffins. They are sooo good. They have the perfect combination of choclate and zuchinni. They have a lot of healthy ingredients as well. Yum!


Ingredients:
1 egg
3/4 C unsweetened applesauce
1/2 C honey
1/3 C almond milk
2 T coconut oil
1 1/4 C grated zuchinni
1 tsp vanilla extract
2 C whole grain flour ( I used 1 C Kamut and 1 C Spelt)
2 T cocoa
1 tsp baking powder
3/4 tsp baking soda
1/2 tsp salt
1 tsp cinnamon
1/2 C dark chocolate chips* optional

Directions: Heat oven to 350 Bake 10- 15 min..  Make about 2 dozen mini muffins.

1. Mix all the wet ingredients together by hand, egg, applesauce, honey, milk, oil, vanilla and zuchinni. Set the mixture aside.
2. In another bowl whisk together, flour, cocoa, baking powder, soda, salt, cinnamon. Fold into the wet mixture until combined. Fold in chips if desired.
3. Grease muffin pan. Put the batter into the muffin pans and place in the oven. Bake and then enjoy!


Thursday, November 18, 2010

Coconut Almond Cocoa Balls (Gluten Free)

I continue to experiment on making different kind of "snack balls". I sent some of these to my daughter and she Loved them. She keeps talking about them. I need to send her some more. =) I just store them in my freezer in a plastic Ziplock. They are a quick and healthy snack. The good part is that it tastes good as well. =)
This is the coconut cream I used, I have also used coconut oil.
Ingredients:

1C pitted dates
1 T unsweetened cocoa
2 1/2 T coconut cream or coconut oil
1/4 C almonds
1/4 C unsweetened coconut
1/2 tsp cinnamon
2 tsp honey
1/2 tsp vanilla

Directions:

1.Put dates and nuts in the blender or food processor. Blend till it is ground up fine. Then add the remaining ingredients and blend till it is all combined.

2. Dump out on to a bowl or plate and roll into balls. The yield you get, will depend on the size you want them to be. I made them a little smaller this time, and I made about 10.

* It is better to make multiple batches. If you put too much into the blender or food processor at one time, the ingredients won't get chopped up and mixed as well. That has been my experience.
They are a yummy treat.

*The mix doesn't stick together until you roll them into balls. When you pour out, it will be all separated. Then when you roll a clump together it will stick together. If you want it to be moister you could add a little more honey. Happy snacking!