Friday, August 14, 2026

Healthy Chocolate Zucchini with added Veggies (Sweet potatoes and Avocado) Gluten free


 Happy August! This summer goes by way too fast for me such a beautiful time of year. If you would like me, I’m always trying to find more ways to incorporate vegetables into my diet. These little muffins fit the bill. I think the avocado added to it nice dimension of moistness to the muffin. You could throw in some chocolate chips for extra chocolate flavor. I especially liked them the second day after they had been stored in the fridge. The flavor was amazing. I like true muffins a little less sweet, but you may prefer a sweeter muffin and add a whole cup of honey. 

I hope you enjoy them like I have. 😉

2 Cups zucchini shredded

2 Cups sweet potatoes shredded

4 eggs


1 avocado mashed


2 Tablespoon lemon juice


2 teaspoons vanilla  


2/3 Cup honey or 1 cup for more sweetness


2 teaspoons cinnamon 


2 teaspoon baking soda


1/2 teaspoon salt


3 c oat flour or flour of choice


1/4 C cocoa powder 


* Optional 1/2 Cup mini dark chocolate chips


Preheat oven to 350. Makes 24 small muffins


Mix the wet ingredients together with a large spoon. (First 7 ingredients) Then stir in the dry ingredients just until completely moistened. Stir in chocolate chips if desired. Pour


prepared muffin cups. Place pan and preheated oven. 

Bake 12 to 15 minutes depending on your oven. 


Tuesday, May 5, 2026

Healthy Sweet Potato Muffins and health benefits of sweet potatoes (gluten free)


Sweet potato and oatmeal is such a classic, comforting combination. There is something uniquely cozy about the way cinnamon and roasted sweet potato fill a kitchen—it’s essentially "autumn in a tin," no matter what time of year it is.

Leaving the oats whole adds to the texture.  It transforms the muffin from a standard cake-like texture into something more substantial and "toasty," which pairs perfectly with the natural creaminess of the sweet potato.

Why this combination works so well:

The Texture Balance: Sweet potatoes provide incredible moisture without needing excessive oil or butter. When you fold in whole rolled oats, they soak up just enough of that moisture to soften while still providing a satisfying, chewy bite.

The Aroma: When sweet potato muffins bake, the natural sugars in the potato undergo a slight caramelization. When that hits the heat alongside spices like cinnamon, nutmeg, or ginger, it creates that rich, "warm" scent you mentioned.

A "Slow-Burn" Snack: Since sweet potatoes are packed with complex carbohydrates and oats are high in fiber, these muffins offer a much steadier energy release than a typical flour-heavy blueberry or chocolate chip muffin.

A Quick Tip for the Best "Whole-Oat" Texture

If you find that your muffins ever get too moist (which can happen with very large sweet potatoes), you can lightly toast your whole oats in a dry pan for 3–5 minutes before adding them to the batter. This deepens the nutty flavor and ensures the oats stay distinct and textured rather than getting too soft.


Enjoy!

Ingredients

  • 1 cup mashed sweet potatoes
  • 1/4 cup olive oil or coconut oil
  • 1/4 cup plain yogurt (you can use Greek)
  • 2 Tablespoons almond milk
  • 1 teaspoon vanilla 
  • 1/3 cup maple syrup or 1/2 cup if you want sweeter or honey^
  • 2 eggs
  • 2 cups old fashioned oatmeal
  • 1 teaspoon baking powder
  • 1/2 teaspoon baking soda
  • 1/4 teaspoon salt
  • 1 big teaspoon cinnamon
  • 1/4 teaspoon of nutmeg *optional


  1. Heat oven to 350 and prepare muffin tins with paper cups or spray with nonstick spray.

      2. In a large bowl stir together potatoes, oil, milk, vanilla, syrup and eggs. Stir until all combined.

      3.In a small bowl stir together, oatmeal, baking powder, baking soda, salt, cinnamon and nutmeg               until all combined.
 
      4. Stir in dry ingredients to wet ingredients until all combined. I sometimes like to let the mixture                sit for 5 to 10 minutes to let the flavors meld together. 

      5. Pour into prepared muffin tins bake about 15 minutes. 

      6. Take out of oven to cool and enjoy!

      7. Store in an airtight container in fridge or in freezer. 


           Health Benefits of Sweet potatoes

  • Rich in vitamins A and C, promoting healthy vision and immune function.
  • High in dietary fiber, aiding digestion and promoting gut health.
  • Contains antioxidants that help combat oxidative stress and inflammation.
  • Low glycemic index, making them a good option for blood sugar control.
  • Packed with potassium, supporting heart health and regulating blood pressure.
  • Versatile and easy to incorporate into various dishes for balanced nutrition.


Thursday, March 21, 2024

Nutty Collagen Bites

 I have enjoyed making these for the last month or so with different variations. Sometimes chocolate flavored or unflavored Vital protein. Both have been great. I just store them in the freezer in a glass covered freezer container or ziplock bag. Then I grab one or two out when I want a protein snack between meals. Goes great with an apple. 


You could use this brand of collagen or a brand you like better. I have done it with both flavors and has worked well with both. This brand has a good source of protein too


Recipe 

Ingredients 

1 cup of nut butter of your choosing 

2 Tbsp honey

8 Tablespoons of collagen powder or protein powder 

2 tablespoons chia *optional 

Directions 

1. Put all ingredients in a small bowl. Stir until all mixed together. I sometimes knead together with my hands. (If needed add more collagen to get desired consistency.)

2. Roll into small balls. Place in freezer air tight container or ziplock. Place in freezer. 

3. Take out and eat when you need a nice protein snack. 

Enjoy!


Tuesday, October 25, 2022

Pumpkin Chocolate Chip Bunt-let (Gluten free)


Happy Fall! It is a wonderful time of year to enjoy pumpkin. I called my daughter yesterday and she was making pumpkin bread. It was a rainy day. It was on my mind too. What can I make with pumpkin. I must admit. I enjoy pumpkin all year. It isn't just for Fall in my eyes. I was telling my daughter- in-law she should make pumpkin chocolate chip cookies today.  I have gotten smarter through the years to buy a supply of pumpkin when it goes on sale. :)  I learned from my experience of going to the store and having them out of pumpkin during the Fall season. That was sad. :(

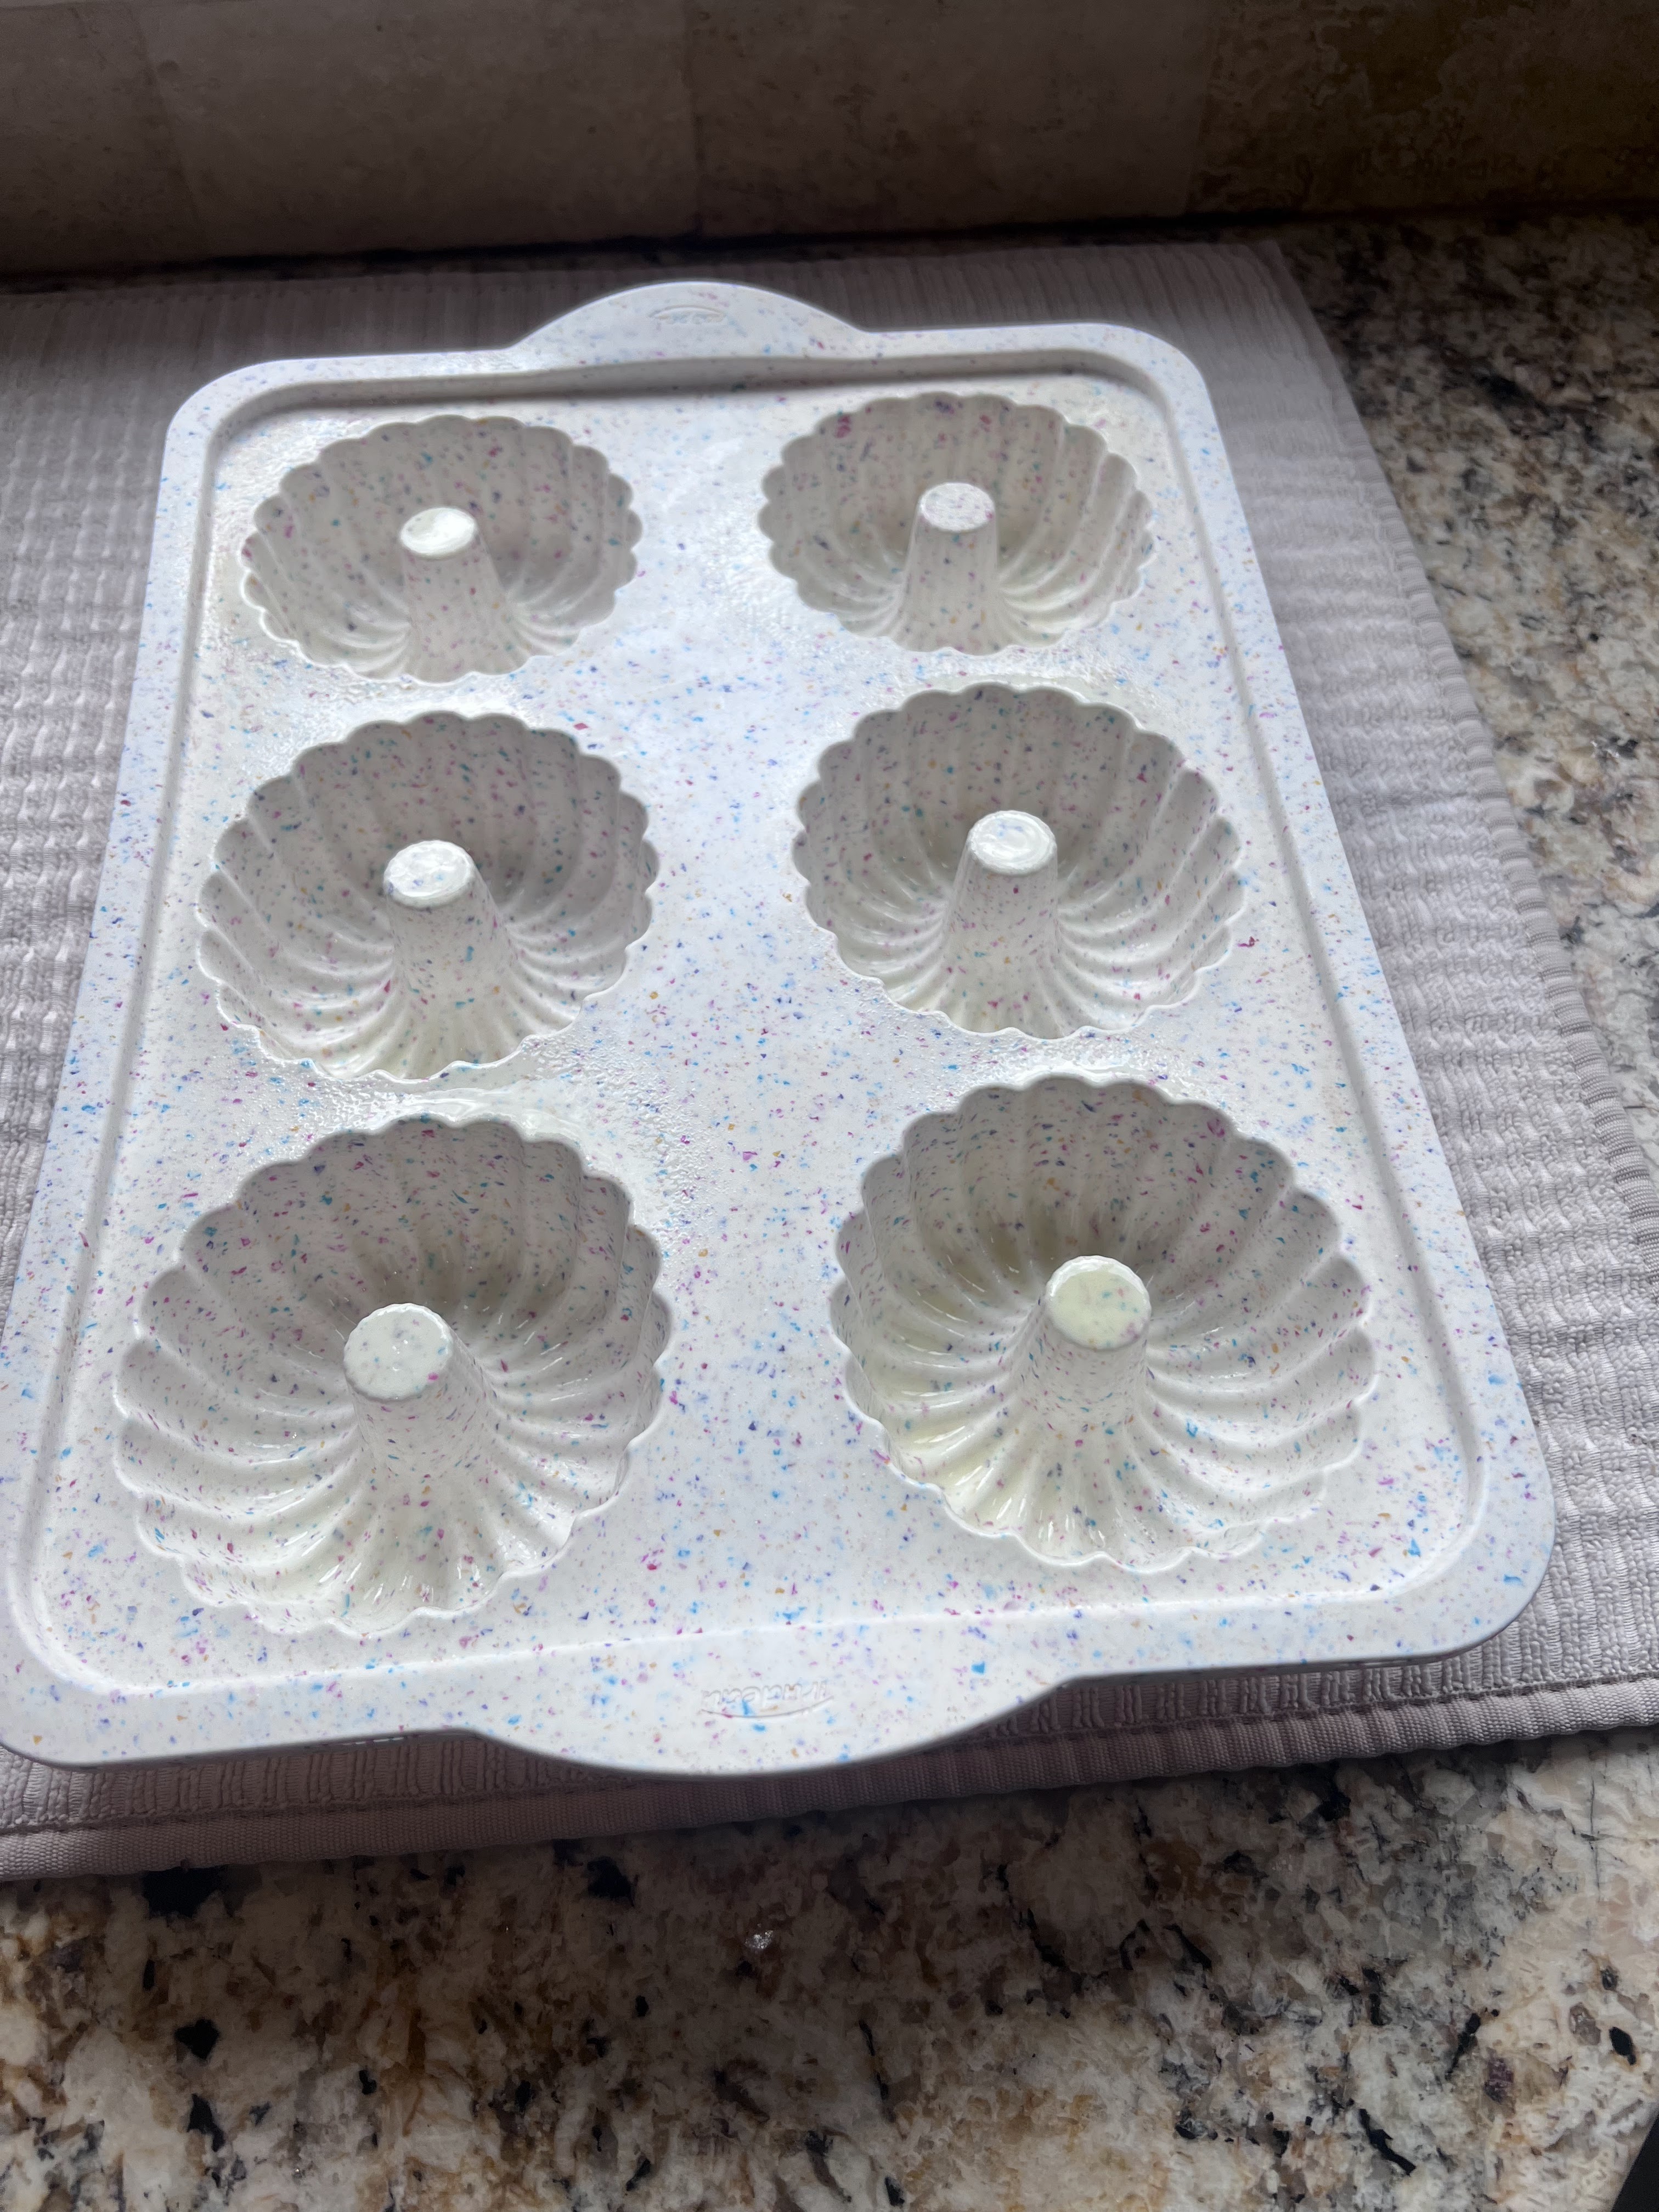
My family our fans of these cute little bunt-lets. They are so fun to make. I found an awesome pan here . It is so easy to use and they come out so easily. I opted to make these today with just a light sprinkle of powdered sugar. They were so delicious. Full of flavor and they tasted so good warm. The recipe could be made into muffins or a small 8X8 cake. I made it gluten free you could also make it with regular flour.  Happy baking.

Ingredients: Heat oven to 350  Makes 6 buntlets

1/2 Cup Canned Pumpkin

1 Tablespoon Vinegar

1/4 Cup Water

3 Tablespoons Oil (Grape seed Or oil of choice)

1 egg

1 teaspoon Vanilla extract

1 Cup Almond Flour

1/2 Cup BobRed Mill gluten free flour or regular flour

1/2 Cup coconut sugar or Sugar of choice

1 Tablespoon Pumpkin Spice seasoning

3/4 teaspoon baking soda

3/4 teaspoon baking powder

1/2 teaspoon salt

1/2 mini chocolate chips (Optional)

powdered sugar for topping


1. In a small bowl pour in first 6 ingredients. Whisk for a couple minutes and let sit. 

2. In another small bowl pour in flours, sugar, pumpkin spice, baking soda, baking powder and salt. Whisk until all combined.

3. Pour liquid into dry ingredients. Mix until just combined. Don't over stir. Fold in the chocolate chips. 

4. Spray non stick cooking spray on pan of choice. 

5. Pour batter into pan. (Bunt-let, muffin or 8X8 Square)

6. Bake approximately 20 min.  

7. Tip over pan on to cooling rack. 

8. Dust with powdered sugar and Enjoy every bite. 

9. Store leftovers in airtight container. They can be frozen. 


Tuesday, June 1, 2021

Carrot Cake Bites

I love the ingredients in carrot cake. This is a fun way to get a mouth full of the flavors of carrot cake in a snack bite. They passed the taste test with my 3 year old grand daughter and my husband. Eating one is not enough. I hope you are having a beautiful week. 


Carrot Cake Bites

Ingredients  makes approx 16 bites

10 medjool dates Pitted

1 cup  pecans

1 cup  almonds

1/2 cup shredded carrots

1/3 cup unsweetened shredded coconut

1 1/2 Tablespoon of coconut oil

2 teaspoons cinnamon

pinch of salt 


Directions

Pour all of the ingredients into a power blender and blend until crumbly. It will require you turning on and off the blender to stir with a rubber scraper to redistribute the mixture. Then when process  of blending is complete, roll the mixture into small balls. Store in an airtight container in the fridge. Enjoy


Tuesday, August 25, 2020

Healthy Fig Bites (gluten free)

Fig Bites 

             Hi! It has been a while since I shared a recipe. I thought it would be fun to pass this yummy snack along. I have enjoyed eating figs lately. I have been excited about the calcium they have in them. I am always looking for foods that have calcium in them. They are a healthy treat. When you make them into these healthy bites you have a wonderful snack. 💕


Recipe 

3/4 Cup Sunflower Seeds
1/2 Cup chopped up Figs
1/2 Cup Chopped up Almonds (or nuts of your choice)
4 Tablespoons of honey
1/2 Cup Almond Butter
!/2 Cup Old fashioned rolled Oats (gluten free)
1 C unsweetened Coconut Flakes 

Instructions

1. Grind the sunflower seeds in blender.

2. Pour sunflower seeds into a bowl. 

3. Stir in the remaining ingredients into the bowl until all combined. 

4. Form into bites. 

5. Put on cookie sheet and freeze about an hour. Then store in air tight container in the freezer. 

6. Will store about 2 months. 

7. Makes about 16 balls depending on the size you make. Enjoy!!!

Add caption


Friday, March 15, 2019

Almond Butter Cups (Healthy)


 These are a fun healthy snack. They can be enjoyed all day long. They are loaded with protein and low sugar. They taste great too.  A great little pick me up for your day. Have a great weekend. Spring is coming up quick. Love it.


Ingredients

Bottom layer

1/3 Cup almond butter (no sugar added) (Or nut butter of your choosing)
3 Tablespoon coconut oil
2 Tablespoons honey
1 teaspoon vanilla extract
3 Tablespoons unsweetened cocoa powder

Top layer

1 Cup almond butter (no sugar added)
1/3 Tablespoon coconut oil
2 Tablespoons honey
1 teaspoon vanilla extract

Makes about 9 regular or 16 mini cups

1. In a small bowl mix together the first 3 ingredients with a spoon. If needed put in microwave for 15 seconds to soften. It should be a nice smooth consistency.

2. Then stir in the vanilla and cocoa powder until all combined and smooth.

3. Put a spoonful into each cup greased muffin pan, mini or regular size. You can also use muffin cups. (I have a picture of making them with cups and without)  It should just be enough to cover the bottom.

4. Mix together the first 3 ingredients for the top layer. If needed put in microwave for 15 seconds to soften and get a smooth consistency. Then stir in the vanilla until smooth.

5. Pour the top layer by spoonful on top of the bottom layer. Smooth with spoon to completely cover the bottom layer.

6. Place muffin pan in the freezer for. Should harden in 30 min. Take out of muffin pan and store in air tight container in freezer or fridge for easy access for a healthy snack. Enjoy!!


Wednesday, February 27, 2019

Coconut Seed Clustered Granola (Grain Free)

 Hi, It has been a while since I took the time to put in a recipe. I still love creating recipes. Britney my daughter has been busy creating too. She is expecting her first daughter after 4 boys very soon. We are excited.  She is a busy Mama.  Our family gets three beautiful grandchildren this year. Great things are happening.

I found some coconut clusters at Costco a while ago. They had coconut, seeds and chia in them and I fell in love with them. Well I have a large bucket of shredded coconut, and so I thought it would be fun to try, and make some on my own. My belief is it is always a healthier option to make your own if you are able to.

Well I made this last week for some friends and it was a big hit with my friends and family so I thought it would be fun to share it with you. I love it!
Ingredients

2 Tablespoons Coconut Oil                  
1/4 Cup Honey
4 Cups of Unsweetened Coconut Flakes
1 Cups Raw Pumpkins Seeds
1 1/3 Cups Raw Sunflower Seeds
6 Tablespoons Chia Seeds

Directions

Stove top method 

In a large pot on the stove. Turn the heat to medium and pour in the oil and honey. Stir together and heat until warm. Then stir in the coconut and turn down the heat to medium low. Stir in the coconut in with the honey mixture until the coconut is all covered. The coconut flakes will start to turn golden. Stir in the seeds and continue to stir until the coconut is a light golden brown. 

Take pot off of the stove and pour the mixture on to a parchment paper or greased pan. Spread out and let cool. Store in an air tight container. 

In oven method Preheat oven to 325

Pour all of the Ingredients into a bowl. Stir it until all ingredients are combined. Pour ingredients on to greased cookie sheet. Spread out the ingredients evenly. Place pan in preheated oven. Bake for 13-20 min. Until the coconut turns light golden brown. You can stir the granola halfway through for even baking. 

Take out of the oven and cool. Store in an air tight container.  Enjoy!


Wednesday, September 27, 2017

Blender Banana "Muffs"( Healthy &Gluten Free)


One of my daughters and I started calling muffins "Muffs" a long time ago. It is has been a fun name for them. Muffins are a family favorite around here. Yum! You can either make the gluten free version or whole grain. Either way they will be delicious. Enjoy!

Ingredients

3 ripe bananas broken up
1/4 cup honey
1 teaspoon vanilla
1 egg
3 Tablespoons coconut oil
1 cup gluten free flour or whole grain
1 teaspoon baking soda
1/4 teaspoon salt


Directions   (makes 11-12 muffins)

1. Heat oven to 350.  Grease muffin pans.
2. Place in blender banana, honey, vanilla, egg and oil. Blend in blender until smooth. 
3. Pour into the blender the flour, soda, and salt. Just until combined. 
4. Scoop muffin mix into greased pan.
5. Bakes for 20-25 minutes until muffin bounces back when you push on it. 
6. Cool muffins on cooling rack. Enjoy!


Monday, September 25, 2017

Oatmeal Chocolate Chip (Gluten free & Dairy Free)


It is crazy we already have some snow on our mountains. We will see how long it lasts the weather can shift back and forth. I went on a walk and took in all the beauty. The water was running down the wash. I love the sound of water. The leaves on the trees are starting to turn beautiful colors. They looked so vibrant. The colors on the mountain are starting to change. Some beautiful flowers still. We live in a beautiful world. 

I have a grandson who is all a restricted diet so I try to cater some foods to his needs. He gets so excited when he knows its a green light and he knows he can eat it. If you don't have diet restrictions then you could use the regular oatmeal. Don't be scared away from these. They have great flavor and chewiness. All of my family enjoyed them.  Enjoy!

Ingredients

1 cup gluten free old fashioned oatmeal
1 cup gluten free oat flour
1/2 teaspoon baking powder
1/2 teaspoon baking soda
1/4 teaspoon salt
1/4 cup coconut oil
1/4 cup coconut sugar
1/4 cup honey
2 eggs or (2 Tablespoons ground flax + 6 Tablespoons water whisk together. Set aside 15 min.)
1 teaspoon vanilla
1/2 cup chopped up dark chocolate chips (Dairy free if desired)
1 cup gluten free old fashioned oatmeal.

Directions

1. Heat oven to 350.
2. In a medium size bowl whisk together oatmeal, oat flour, baking powder, baking soda, and salt.  Set aside.
3. Stir in bowl or blend in blender oil, sugar, honey, eggs and vanilla.
4. Fold in the dry ingredients until all combined.
5. Fold in chips and oatmeal until all combined.
6. Scoop on to cookie sheet and bake for 8-12 minutes. don't over bake.
7. Take out of oven and cool cookies on cooling rack.
8. Store in airtight container and store in fridge or freezer.


Monday, September 18, 2017

Golden Pumpkin Muffins (Gluten free, Vegan, Dairy free,)


I went on a walk this morning it couldn't have been more beautiful. It was so invigorating. I love going on walks. Hope your week is starting off great too.

It is that wonderful time of year when everyone starts buying pumpkin and baking wonderful bakes goods. These were sooo good. I loved eating two muffins at a time. I love pumpkin! I hope you do too.

Ingredients

1 cup pumpkin puree
1/4 cup coconut oil
1/4 cup honey
1 egg or flax eggs (1 tablespoon ground flax + 3 tablespoons water, whisk together set aside for 15 min.)
1 teaspoon vanilla
1 1/2 cup gluten free oat flour
1/2 cup almond flour
1 teaspoon baking soda
1/2 teaspoon baking powder
1 teaspoon cinnamon
1/2 teaspoon ground cloves
1/2 teaspoon ground nutmeg
1/4 teaspoon salt
1/3 cup chopped up dark chocolate chips (Vegan chips if desired)

Instructions

1. Heat oven to 350. Grease muffin cups.
2. Blend together in blender pumpkin, oil, egg and vanilla. blend until smooth.
3. Pour in dry ingredients into the blender, flour, almond flour, baking soda, cinnamon, cloves, nutmeg, and salt. Pulse until just combined. (You could also stir it in with a spoon.)
4. Fold in the chocolate chips.
5. Scoop into greased muffin pans. Place in preheated oven. Bake for 15 min or until done.
6. Cool on wire rack.
7. Store leftovers in airtight container. Store in fridge or freezer.

Friday, September 8, 2017

Healthy No Bake Brownies (Gluten Free)


It is so wonderful to enjoy this time of year. I am hanging on to the warm weather as long as I can. There are still a lot of beautiful flowers too. I love warm weather. I love to go on morning walks and take it all in. I exercise as much for my mental health as my physical health. It is so healing. It gives me time to ponder and get things sorted out in my head. I also have done some meditation. I know I have a daughter and son that really like meditation. I want to do that more.

It is wonderful to be able to create little snacks that taste really good and are healthy at the same time. These are taster approved my daughter ate one and then came back for a second one. :) Winner!

They whip up fast and you can make extra for later. You can make them with gluten free oat flour if you are eating gluten free.

Ingredients

1/2 cup of oat flour*(Gluten free)
1/2 cup unsweetened cocoa powder
1/4 cup ground chia (Optional)
1/4 cup dark chocolate chips chopped up*
3/4 cup almond butter
1/4 cup honey
1 teaspoon vanilla
2 Tablespoons coconut oil

Directions  (makes about 10 brownies)

1. In a mixing bowl, mix together all the dry ingredients: flour, cocoa, chia* and chips. 
2. Blend together in blender almond butter, honey, vanilla and oil until all creamy.  Mix into dry ingredients until all combined. 
3. Scoop into balls with a cookie scooper or with spoon. I rolled them into smooth balls with my hands. Delish!
4. Left overs can be stored in an air tight container and store in fridge or freezer.


*I just blend up old fashioned gluten free oatmeal in the blender until it turns to powder.
*I put the chocolate chips in the blender for a couple seconds to break them into smaller pieces.

Wednesday, August 16, 2017

5 Tips that Will Make or Break School Lunches


For us, school is starting next week. And I will, for the first time, have two children taking lunches to school. While I am excited to get back in to the schedule that school provides, I'm not as excited about making lunches every. single. day. I thought I'd revisit our book The Mix and Match Lunchbox and give you 5 tips that make or break having a healthy, easy lunch for your kiddos.

1. Plan Ahead


You know how this works with dinnertime. If you plan what dinner is earlier in the day, dinner happens. If you don't, you end up throwing together whatever you have. And sometimes that works better than others.

A planning page in The Mix and Match Lunchbox


The same thing goes for school lunches. If you sit down on Saturday or Sunday and make a small menu, then you know what to buy. You'll see if there are things you can or should make ahead of time.

2. Think about the Parts of Lunch


We like to do this with a simple formula:

Whole Grain + Protein + Fruit + Veggie


This makes lunch so customizable! And if you make a list of items for each section, your child can even make lunch themselves. For a younger child, you might make a PBJ the whole grain and protein, while for an older child, you might need a separate protein to keep them full for school.

But if you fill this formula, you have a complete, healthy lunch! I would also include water and, on special occasions, a treat.


3. Make Recipes Ahead


It can be hard to have everything on hand for a good lunch. But if you make one thing ahead of time in bulk and freeze in individual bags, it makes it that much simpler on a busy morning when you have less than five minutes to make lunches. We like muffins, smoothies, homemade granola bars, quiches, and boiled eggs.


4. Get the Kids to Help


Is this all your job? Well, kind of. But it doesn't have to be. What can the kids do? Can they have a say in the planning? (With guidelines, of course.) Can you assign your budding cook a make-ahead recipe? Or just keep a list of things in each healthy section (grain, protein, fruit, and veggie) and let them pick from bins of each category.

The truth with kids is, if they pick it, they will be more likely to eat it.

Yogurt and mix-ins are always a hit at our house.

5. Make it Fun!


For some parents this might include cutting food into cute little shapes. If that's you, than go for it! I feel good when I slip in a little note. This could be a compliment, a love note, or a joke or fun fact.

But cute supplies go a long way. Consider a pack of food picks, some cookie cutters, or bright silicone cupcake liners.Those could be just the trick for adding some happiness to your child's lunch!


Extra Credit :)


Do you need more help to get your lunches going? Check out our book The Mix and Match Lunchbox book or the Mix and Match app for over 27,000 delicious lunch combinations!


Thursday, August 10, 2017

Chocolate Zucchini Muffins (Gluten-free)


I have a great thing for you to make with all of your zucchini.There is something wonderful about the combination of zucchini and chocolate combined. I love how soft and delicious these are. I put some extras in the freezer in zip locks. It was so wonderful to take them out of the freezer and heat them up and enjoy a yummy snack. Every since I made them last weekend I have been wanting to make them again. So Good!!! They always have zucchini in the store.
Cherie


Ingredients
1 teaspoon of vanilla
1/3 cup of oil (I used grapeseed oil)
2/3 cup of honey
2 eggs
2 cups of grated zucchini
2 tablespoons cocoa powder
1 teaspoon baking powder
1/2 teaspoon baking soda
1 1/2 cups + 2 tablespoons quinoa flour (You could replace w/  a different wholegrain flour)
2 tablespoons cornstarch
1/4 cup dark chocolate chips, chopped up


Directions
1. Preheat oven to 350 degrees. In a bowl beat together vanilla, oil, honey, eggs, and zucchini. Set aside.
2. In a small bowl pour in all the dry ingredients and stir with a wire whisk. Fold in the chocolate chips.
3. Combine the two mixtures together into one bowl. Stir until just combined.
4. Pour into greased muffin pan. Place in preheated oven. Bake about 15 minutes or until done.
5. Cool a few minutes and then take out of the muffin pan and cool on cooling rack.
* You could put in a square pan or bread pan instead. You will just have to watch the cooking time a little closer. Remove when done.
Makes 12 muffins

Thursday, July 20, 2017

Delicious Zucchini(Bread) Waffles (Gluten Free)


It is a wonderful idea to find ways to add vegetables to the foods you make. My daughter was talking to me about the idea of starting at breakfast and adding the vegetables to what you are making. Great way to start your day. So I did that today and they were delicious. I have always loved zucchini bread this is a great way to capture the flavor with out all the sugar. 

You can either use gluten free flour or whole grain. I tried both and they worked great. I have a Cusinart waffle maker that makes them crispy on the outside and soft inside. Yum!!!


Ingredients

1 cup gluten free flour * or whole grain flour
1 1/2 cup water
1 egg
3 Tablespoons of olive oil
3 Tablespoons of coconut sugar or other sweetener
1 cup grated zucchini
2 Tablespoons of baking powder
1 teaspoon of cinnamon
2 Tablespoons of chia * optional

Directions serves 2-3

1. Preheat waffle iron and spray with non stick cooking spray.

2. Pour all the ingredients into the bowl and stir just until all mixed.

3. Pour on to hot waffle iron and bake to desired doneness.

4. Take out and enjoy. I have frozen the leftovers and put in toaster when I was ready to eat them. I love them with apricot jam.

* I used gluten free Namaste flour.


Saturday, July 1, 2017

Cashew Butter Brownies (Gluten Free, Paleo, Vegan)


 These fun brownies are chewy and delicious. No flour added to them. It is a great little snack or dessert. No added flour, so they are gluten free. Chia added instead of eggs so they can be vegan if you add vegan chocolate chips.

Ingredients

2 Tablespoons of ground chia seeds (Can grind in small coffee grinder)
1/3 cup of water
1 cup of cashew butter
1/4 cup dark chocolate chips (Use vegan for vegan option)
1/3 cup coconut sugar
1 teaspoon of vanilla
1/3 cup water
1/2 teaspoon of baking soda
1/4 cup dark chocolate chips (I like the mini chips)

Instructions  Preheat oven to 350

1. In a small mix together ground chia and water.  Let the mixture start to turn into a gel. Then mix in a mixing bowl or blender, chia mixture, chips, sugar, vanilla, water, baking soda. Until all combined.

2. Fold in the remaining chocolate chips. Pour into a greased square pan. (I like cooking in stoneware dishes for best outcome.)

3. Bake for 20 minutes or until cooked all the way through. Cool and cut into squares. Makes about 20 squares. Store leftovers in airtight container.


Friday, June 30, 2017

Granola and Berries (Gluten Free option)


I think Breakfast is one of my favorite meals. I love when I add berries to what I am eating. It brings me so much joy to see all the beautiful colors plus I love berries and the added nutrition they add to the meal. Yum! Enjoy a great way to start your day.  It also makes a wonderful snack. 


It is wonderful to be enjoying Summer and all the fun that goes along with it. We had a wonderful family reunion with 90 of us. We love our family. It is so nice to have so many people that love you and are their to support you. I also can't get enough of this sunshine and blue sky. I love the warm nights with the slight breeze. I think that is what it will be like in heaven. 


Ingredients

Granola

2/3 cup honey
1/2 cup coconut oil

3 cup  old fashioned oatmeal (gluten free)
1 cup almonds chopped up coarse
1/4 cup sesame seeds
1 cup sunflower seeds
1 cup unsweetened coconut
1 teaspoon cinnamon
1/2 tespoon fresh ground nutmeg

* dried fruit optional raisins, dates, craisins etc..

Directions: Heat oven to 250
1. Melt the honey and oil together in a small bowl. On the stove or in the microwave. Set it aside.

2. Put all the dry ingredients in a bowl together. Pour in the honey mixture. Stir till all combined. 

3. Put a parchment paper on 1 cookie sheet.  Pour the granola on to cookie sheet. It will be thick. 

4. Place in the oven. Bake 30 min. Stir a couple times during cooking time.  

5. Let cool on the counter and store in an airtight container. 

6, Pour granola into a bowl add fresh berries (blueberries, raspberries, strawberries) and then pour on  almond milk or cashew milk poured on top.  Enjoy!